Introduction
Repairing HDMI ports on motherboards can be a challenging task. This step-by-step guide will provide you with the necessary instructions to fix these ports effectively and efficiently. By following these instructions, you can ensure that your HDMI ports are securely attached and prevent any damage in the future.
Understanding the Issue
The problem with HDMI ports on motherboards can be quite frustrating. These ports are essential for connecting devices such as TVs, monitors, and gaming consoles to your computer. When they become damaged or faulty, it can severely limit your ability to enjoy high-quality audio and video.
Repairing HDMI ports is important because it allows you to restore connectivity and functionality to your devices. By fixing these ports, you can avoid the hassle of having to replace the entire motherboard, which can be costly and time-consuming.
There are several signs of a damaged HDMI port to look out for. These include a blurry or distorted display, no audio or video output, or a loose connection. If you notice any of these issues, it’s likely that your HDMI port needs repair.
There are common causes of HDMI port damage that you should be aware of. One of the main causes is physical damage, such as bending or breaking the HDMI cable while it’s connected to the port. Another common cause is overheating, which can occur if your computer or device generates excessive heat. Additionally, improper insertion or removal of HDMI cables can also lead to damage over time.
Assessing the Damage
Before proceeding with the repair of HDMI ports on motherboards, it is crucial to assess the extent of the damage. This assessment will help determine the appropriate course of action and ensure a successful repair.
Visual Inspection of the Damaged HDMI Ports
The first step in assessing the damage is to visually inspect the HDMI ports. Carefully examine the pins and connectors to identify any visible signs of damage, such as bent or broken pins, loose connectors, or any other physical abnormalities.
Take a close look at the solder joints as well. Ensure that they are secure and properly attached to the motherboard. If there are any signs of poor soldering, such as incomplete joints or loose connections, additional repair work may be required.
Identifying the Extent of the Damage
Once you have visually inspected the damaged HDMI ports, it is important to determine the extent of the damage. This will help you understand the level of repair needed and the complexity of the task.
Some common types of damage include pins pushed out of the port, broken pins, or damage to the internal connectors. Identifying the specific type and severity of the damage will guide you in selecting the appropriate repair method.
Importance of Proper Assessment Before Repair
Properly assessing the damage before starting the repair process is essential to avoid further complications. Rushing into the repair without a thorough assessment may lead to ineffective repairs or even additional damage to the motherboard.
By taking the time to assess the damage, you can develop a clear plan of action and ensure that you have all the necessary tools and materials for the repair. This will save you time, effort, and potential frustration in the long run.
Tools Needed for Assessing the Damage
When assessing the damage to HDMI ports on motherboards, you will need a few essential tools:
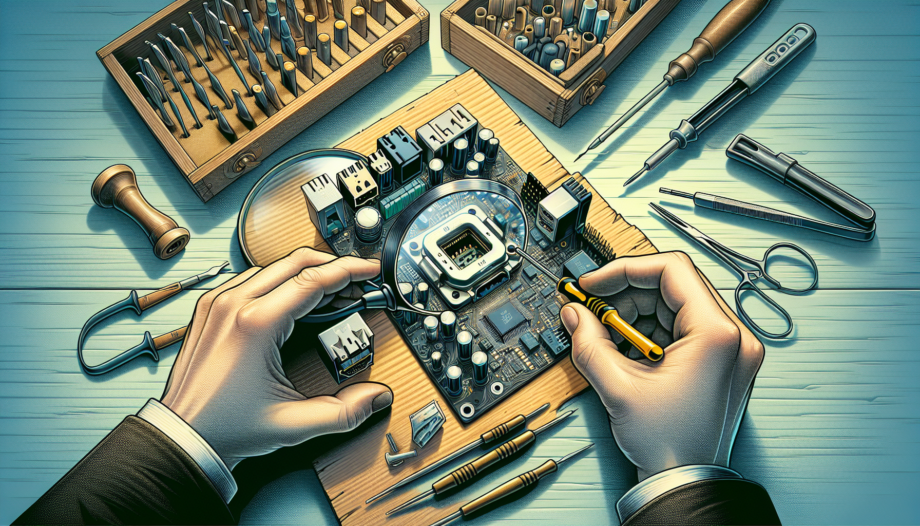
- Magnifying glass or microscope: These tools can help you closely examine the pins and connectors for any tiny details that may not be visible to the naked eye.
- Tweezers: You may need tweezers to carefully manipulate the pins or connectors during the inspection process.
- Multimeter: This tool can be used to test the continuity of the pins and check for any electrical issues that may be contributing to the damage.
- Soldering iron and solder: If you notice any loose or damaged solder joints, you may need to resolder them to ensure a secure connection.
By having these tools ready, you can accurately assess the damage and proceed with the appropriate repairs, whether it’s fixing bent pins, replacing broken connectors, or reflowing solder joints.
Repairing the HDMI Port: Step 1
Before starting the repair process for the HDMI port on your motherboard, it is important to properly prepare the motherboard and create a suitable environment for the repair. This step will ensure that the repair is done safely and effectively.
Preparing the Motherboard for Repair
Begin by carefully removing the motherboard from your computer or device. This will allow you to have better access to the HDMI port and ensure that you can work on it comfortably.
Place the motherboard on a clean and static-free surface, such as an anti-static mat or a wooden table. This will help prevent any electrical damage to the components and reduce the risk of static discharge during the repair process.
Cleaning the Area Around the HDMI Port
Before proceeding with the repair, it is important to clean the area around the HDMI port. Use a small brush or a can of compressed air to remove any dust, debris, or loose solder particles that may be present.
Clean the pins and connectors of the HDMI port using a lint-free cloth or a cotton swab dipped in isopropyl alcohol. This will help ensure a clean and reliable connection after the repair is complete.
Ensuring Proper Ventilation During the Repair Process
Proper ventilation is essential during the repair process to prevent overheating of the motherboard and other components. Make sure to work in a well-ventilated area or use a small fan to provide adequate airflow.
If necessary, you can also use a heat sink or a heat gun with temperature control to protect the surrounding components from excessive heat during the repair.
Using Appropriate Safety Measures
When working with electronic components, it is important to prioritize safety. Ensure that you are wearing an anti-static wrist strap to prevent static discharge that can damage the motherboard.
Additionally, wear safety goggles to protect your eyes from any potential debris or solder particles that may be released during the repair process.
Repairing the HDMI Port: Step 2
Once you have assessed the damage to the HDMI port on your motherboard, it’s time to move on to the repair process. This step will guide you through the soldering process and ensure a secure and durable connection.
Understanding the Soldering Process
Soldering is the process of joining two metal components together using a heated soldering iron and solder. It creates a strong bond between the HDMI port and the motherboard, allowing for the transfer of audio and video signals.
During the soldering process, the solder is melted and applied to the pins and connectors of the HDMI port. It then solidifies, creating a reliable electrical connection. This process requires precision and careful attention to detail to ensure a successful repair.
Choosing the Right Soldering Equipment
Before you begin soldering the HDMI port, it’s important to have the right soldering equipment. Here are some key factors to consider:
- Soldering Iron: Choose a soldering iron with a fine tip and adjustable temperature control. This will allow you to accurately control the heat and prevent any damage to the motherboard.
- Solder: Select high-quality solder with a flux core for easy application. The diameter of the solder should be suitable for the size of the pins and connectors on the HDMI port.
- Desoldering Tools: It’s also a good idea to have desoldering tools on hand in case you need to remove any excess solder or make adjustments during the process.
By choosing the right soldering equipment, you can ensure a smooth and efficient repair process.
Proper Technique for Soldering the HDMI Port
Here is a step-by-step guide to soldering the HDMI port on your motherboard:
- Preheat the soldering iron to the appropriate temperature based on the solder manufacturer’s instructions.
- Clean the soldering iron tip using a damp sponge or soldering tip cleaner to remove any residue or oxidation.
- Apply a small amount of solder to the tip of the soldering iron to ensure good heat transfer.
- Position the HDMI port on the motherboard and align the pins and connectors with the corresponding holes.
- Gently touch the tip of the soldering iron to the pin or connector and apply a small amount of solder. The solder should flow smoothly and create a round, shiny joint.
- Repeat this process for each pin and connector, ensuring that each joint is secure and properly soldered.
Remember to work quickly but carefully to avoid overheating the components. It’s also important to avoid using excessive force or pressure, as this can damage the pins or connectors.
Ensuring a Secure and Durable Connection
After soldering the HDMI port, it’s crucial to ensure that the connection is secure and durable. Here are some tips to achieve this:
- Inspect each solder joint to make sure there are no cold joints or incomplete connections. Cold joints can cause intermittent connectivity issues and may lead to future damage.
- Use a magnifying glass or microscope to examine the solder joints closely. Look for any signs of poor soldering, such as bridges, splatters, or uneven joints.
- Perform a continuity test using a multimeter to verify that each pin is properly connected and there are no short circuits.
By following these steps and taking the necessary precautions, you can repair the HDMI port on your motherboard effectively and ensure a secure and durable connection.
Repairing the HDMI Port: Step 3
After successfully soldering the HDMI port on your motherboard, there are a few important steps to ensure the repair is effective and durable.
Tips for Aligning the Pins Correctly
When aligning the pins of the HDMI port with the corresponding holes on the motherboard, it’s essential to be precise. Take your time and make sure each pin is properly placed to avoid any misalignment or damage.
Use a magnifying glass or microscope to get a clear view of the pins and their positions. This will help you achieve accurate alignment and prevent any future connectivity issues.
Applying the Right Amount of Heat
During the soldering process, it’s crucial to apply the right amount of heat to ensure a secure connection. Avoid using excessive heat, as it can damage the components or weaken the solder joints.
Use a soldering iron with adjustable temperature control and set it to the appropriate temperature recommended by the solder manufacturer. This will help you achieve optimal heat transfer and prevent overheating.
Avoiding Excessive Soldering
While it’s important to ensure a strong connection, it’s equally vital to avoid excessive soldering. Applying too much solder can lead to bridges or splatters, which can cause short circuits or poor connectivity.
Apply a small, controlled amount of solder to each pin and connector. Ensure that the solder flows smoothly and creates a round, shiny joint without any excess material.
Testing the Connection After Soldering
Once you have soldered the HDMI port, it’s essential to test the connection to ensure it’s working properly. Testing will help you identify any issues or defects in the repair.
Use a multimeter to perform a continuity test. Check each pin individually to verify that it’s properly connected and there are no short circuits. This will help ensure a reliable connection for audio and video signals.
Additionally, inspect each solder joint using a magnifying glass or microscope. Look for any signs of poor soldering, such as bridges, splatters, or uneven joints. Fix any issues you find to guarantee a secure and durable connection.
By following these tips and conducting thorough testing, you can have confidence in the repair of your HDMI port. Enjoy uninterrupted audio and video connectivity with your devices!
Additional Tips and Precautions
When repairing HDMI ports on motherboards, there are several additional tips and precautions to keep in mind to ensure a successful repair process.
Using a Magnifying Glass for Precision
For a more accurate assessment and repair, consider using a magnifying glass or microscope. These tools can help you closely examine the pins and connectors for any tiny details that may not be visible to the naked eye.
With the help of a magnifying glass, you can ensure precise soldering and identify any potential issues or defects before they become a problem.
Avoiding Overheating the Motherboard
Overheating the motherboard can cause damage to the components, affecting their functionality and reliability. To avoid this, it’s important to work with a soldering iron with adjustable temperature control.
Set the soldering iron to the appropriate temperature recommended by the solder manufacturer. This will help you achieve optimal heat transfer without overheating the motherboard.
Protecting the Surrounding Components
During the repair process, it’s crucial to protect the surrounding components from excessive heat or accidental damage. This can be done by using a heat sink or a heat gun with temperature control.
By directing the heat away from the surrounding components, you can minimize the risk of overheating and ensure the longevity of the motherboard.
Ensuring a Clean Workspace
Before starting the repair, it’s important to ensure a clean and organized workspace. Remove any unnecessary clutter and debris that may interfere with the repair process.
Having a clean workspace will help you maintain focus, prevent any accidental damage to the motherboard, and ensure a smooth and efficient repair process.
Conclusion
Taking proper care of HDMI ports on motherboards is essential to ensure reliable audio and video connectivity. By repairing these ports, you can restore functionality and avoid the need for costly motherboard replacements. Here are some key takeaways:
Importance of Taking Proper Care of HDMI Ports
Proper care of HDMI ports involves avoiding physical damage, such as bending or breaking the HDMI cable, and preventing overheating. It’s crucial to handle HDMI cables with care and ensure they are inserted and removed correctly.
Benefits of Repairing HDMI Ports on Motherboards
Repairing HDMI ports allows you to restore connectivity to devices like TVs, monitors, and gaming consoles. By fixing these ports, you can avoid the expense and inconvenience of replacing the entire motherboard.
Final Thoughts and Recommendations
Repairing HDMI ports on motherboards can be a challenging task, but with the right tools and techniques, it’s possible to achieve a secure and durable connection. It’s important to assess the extent of the damage, prepare the motherboard properly, and follow the soldering process carefully. By taking these precautions, you can ensure a successful repair and enjoy uninterrupted audio and video connectivity with your devices.
Additional Images
Here are some additional images that provide further insight into the repair process for HDMI ports on motherboards:
Screenshot 1: Front view of the damaged HDMI ports
This screenshot shows the HDMI ports with the pins pushed all the way out, resulting in visible damage.
Screenshot 2: Comparison of a poorly soldered port vs. a perfectly soldered port
This screenshot showcases the stark difference between a poorly soldered HDMI port and a perfectly soldered one, highlighting the importance of proper soldering techniques.
Screenshot 3: Close-up of puddly and fully attached legs
This screenshot provides a close-up view of the solder joints on the HDMI port, demonstrating the desired outcome of puddly and fully attached legs for a secure connection.
Screenshot 4: Examples of damaged HDMI ports on different motherboards
This screenshot displays examples of damaged HDMI ports on different motherboards, showcasing the various types of damage that can occur.
Video Link
Embed the YouTube video demonstrating the repair process.