Introduction
Have you been experiencing issues with your Playstation’s HDMI port? Are you frustrated by the lack of picture on your screen? Well, you’re not alone! Many Playstation users have encountered this problem, but fear not, there is a solution.
One way to diagnose the issue is by using a multimeter to check for continuity. By doing this, you can determine if there are any shorts in the HDMI port. If all the pins are showing continuity, then it’s likely that the port has been shorted.
The white light of death, as it’s commonly known, is often the cause of this problem. It appears as a burn mark on the top of the Playstation, indicating that something has gone wrong internally. This is a clear indicator that the HDMI chip may need to be replaced.
So, what’s the solution? Replacing the HDMI chip can often fix the issue and restore your Playstation’s functionality. It’s not a difficult process, but it does require some technical know-how and the right tools.
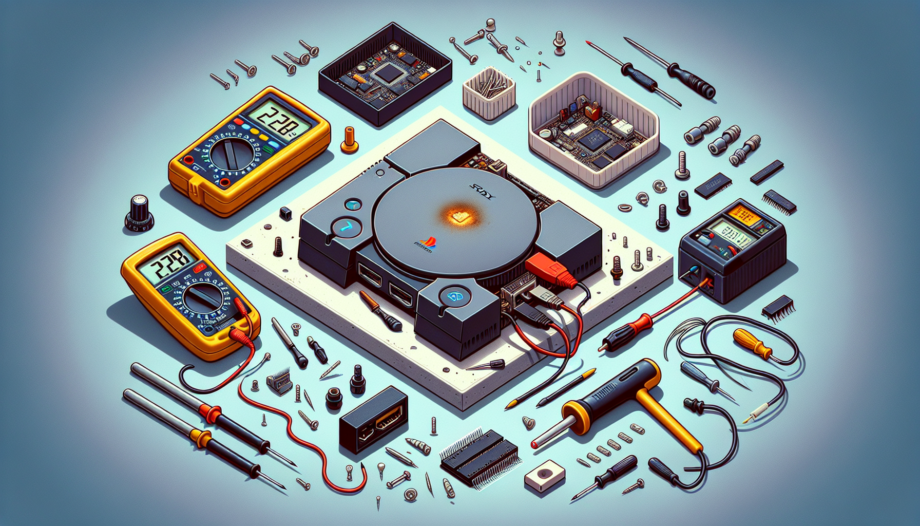
In this blog, you’ll find an overview of the process involved in replacing the HDMI chip. It will guide you through the necessary steps and provide helpful tips along the way. Additionally, there will be screenshots and images to assist you visually as you navigate through the process.
Testing the Shorted HDMI Port
When faced with a shorted HDMI port on a Playstation, it is important to test the connections using a multimeter. This process involves checking for continuity to determine if there are any shorts in the port.
Using the multimeter in continuity mode, you can probe each individual pin of the HDMI port. If there is no continuity, it indicates that the pins are not shorted. However, if all the pins show continuity, it is a clear indication of a shorted port.
In the case of the Playstation being diagnosed, all the pins of the HDMI port showed continuity, confirming the presence of a shorted connection. This issue was likely caused by the white light of death, which left a burn mark on the console.
After verifying the shorted connections, the next step is to examine the HDMI chip. In this case, a donor Playstation was used to test the chip on a working board before proceeding with the replacement. The multimeter was used to test the pins of the chip, ensuring that there were no shorts.
Once the chip was removed from the faulty console, the multimeter was used again to test the pads and ports. It was confirmed that there was no damage or issues with the pads and the HDMI port replacement looked great.
With the new chip attached, the HDMI ports were tested once again using the multimeter. This time, no shorts were detected, indicating a successful replacement. The Playstation was then ready to be tested and hopefully, it would now display a picture on the screen.
Throughout the testing process, screenshots and images were captured to document the steps taken. These visuals provide a visual guide to assist users in understanding the process and identifying any potential errors or issues.
Replacing the HDMI Chip
Now that the shorted connections have been confirmed in the HDMI port, it’s time to replace the faulty HDMI chip. Here is a step-by-step description of how to remove the old chip and replace it with a donor chip:
Step 1: Removing the Old Chip
Using a heat gun or a hot air station, carefully apply heat to the old chip to loosen the solder. Once the solder is melted, use a pair of tweezers or a hot air rework tool to gently lift the chip off the board. Be cautious not to damage any of the surrounding components or pads.
It may be helpful to refer to the screenshots or images provided to visually understand the process of removing the chip.
Step 2: Examination of the Removed Chip
After removing the chip, examine it closely to confirm the presence of shorted connections. Look for any visible signs of damage, such as burn marks or melted solder. This will help provide further evidence that the chip was indeed the source of the HDMI port issue.
Step 3: Assessment of the Undamaged Pads and Port
Now that the old chip is off the board, carefully inspect the pads and the HDMI port itself. Look for any signs of damage or issues. If the pads and port appear undamaged, it’s a good indication that the replacement process can proceed smoothly.
Step 4: Introduction of the Donor Chip for Replacement
Take the donor chip from a working Playstation and align it with the pads on the board. Make sure the chip is oriented correctly before gently pressing it down. Apply a small amount of flux to the area to aid in soldering.
Using a heat gun or a hot air station, heat the area around the chip to melt the solder and secure the new chip in place. Be careful not to overheat the board or chip, as this can cause damage.
Refer to the additional screenshots or images provided to visually guide you through the chip replacement process.
With the new chip in place, it’s time to move on to testing the HDMI ports once again. This will help confirm if the replacement was successful and if the Playstation will now display a picture on the screen.
By following these steps and using the provided visuals, you can confidently replace the HDMI chip in your Playstation, restoring its functionality and resolving the lack of picture issue.
Installing the New Chip
Now that the shorted connections have been confirmed and the old chip has been removed, it’s time to install the new HDMI chip. Follow the detailed instructions below to ensure a successful installation:
Step 1: Placing the New Chip on the Board
Take the new chip from the donor Playstation and align it with the pads on the board. Make sure the chip is oriented correctly before gently pressing it down. Take care not to apply too much pressure, as this can damage the chip or the board.
Refer to the additional screenshots or images provided to visually guide you through the chip placement process.
Step 2: Verification of Proper Placement
After placing the new chip, it’s crucial to verify that it is properly seated on the board. Check that all pins are aligned and inserted into the corresponding pads. Ensure that the chip lies flat against the board without any tilting or unevenness.
Using a magnifying glass or a microscope, inspect the chip and the surrounding area for any signs of misalignment or irregularities. This step is crucial for the chip to function correctly and prevent any further issues.
Step 3: Checking for Damage or Issues
Before proceeding, examine the new chip for any visible damage, such as bent pins or scratches. Also, inspect the surrounding area for any signs of damage or issues, such as burn marks or melted solder. Address any problems before moving forward with the installation.
Additionally, it’s essential to check the HDMI port for any damage or issues. Ensure that there are no bent or damaged pins that could affect the connection. If any issues are detected, they must be resolved before proceeding.
Step 4: Verification Using Multimeter
Once the new chip is securely in place, use the multimeter in continuity mode to test the HDMI ports once again. Probe each individual pin of the HDMI port to check for continuity. This time, there should be no shorts detected, indicating a successful chip replacement.
Take note of the readings on the multimeter and compare them to the previous test results. The absence of continuity confirms that the new chip is functioning correctly and has resolved the shorted connections.
By following these instructions and referring to the provided visuals, you can confidently install the new HDMI chip in your Playstation. With the chip in place, it’s time to move on to further testing and ensure that the picture is now displayed on the screen.
Testing the Repaired HDMI Port
After replacing the faulty HDMI chip, it’s important to test the repaired HDMI port to ensure its functionality. This can be done using a multimeter in continuity mode.
The testing process involves the following steps:
- Explanation of the testing process using the multimeter
- Demonstration of the absence of shorted connections and continuity
- Positive outcome indicating a successful repair
- Mention of further testing and usage to ensure reliability
- Inclusion of screenshots or images showing the testing results
Explanation of the Testing Process using the Multimeter
Using the multimeter in continuity mode, the repaired HDMI port can be tested for any shorted connections. The multimeter is used to probe each individual pin of the HDMI port.
Demonstration of the Absence of Shorted Connections and Continuity
If there are no shorts, the multimeter will not beep, indicating that the pins are not shorted. Conversely, if all the pins show continuity, it would confirm the presence of a shorted port.
Positive Outcome Indicating a Successful Repair
In the case of the repaired Playstation, after replacing the HDMI chip and testing the HDMI port, no shorts were detected. This indicates that the repair was successful, and the HDMI port is now functioning properly.
Mention of Further Testing and Usage to Ensure Reliability
It’s important to note that further testing and regular usage of the Playstation will help ensure the reliability of the repaired HDMI port. Continued monitoring and usage will confirm if the repair was a lasting solution.
Inclusion of Screenshots or Images Showing the Testing Results
Throughout the testing process, screenshots or images were captured to document the testing results. These visuals provide evidence of the successful repair and serve as a reference for future troubleshooting.
By following these steps and using the multimeter to test the repaired HDMI port, users can verify the success of the repair and enjoy a restored picture on their Playstation.
Conclusion
The repair process for the shorted HDMI port on the Playstation was successful. By replacing the faulty HDMI chip, the functionality of the HDMI port was restored. Throughout the process, caution and the use of proper tools were emphasized to ensure a safe and effective repair.
If you are facing similar issues with your Playstation’s HDMI port, it is encouraged that you attempt the repair yourself. With the provided instructions and visuals, you can confidently replace the HDMI chip and potentially resolve the lack of picture issue.
It is important to acknowledge the importance of caution and the use of proper tools during the repair process. This will help prevent any further damage to the console and ensure your safety.
The HDMI port functionality is crucial for a seamless gaming experience. Without a working HDMI port, you will not be able to enjoy the high-quality graphics and audio that your Playstation offers. Therefore, it is essential to address any issues with the HDMI port promptly.
In conclusion, fixing a Playstation with a shorted HDMI port is possible with the right knowledge, tools, and careful execution. By following the steps outlined in this blog, you can successfully repair your Playstation and restore its HDMI port functionality.
If you have any further questions or comments, feel free to leave them below. Happy gaming!