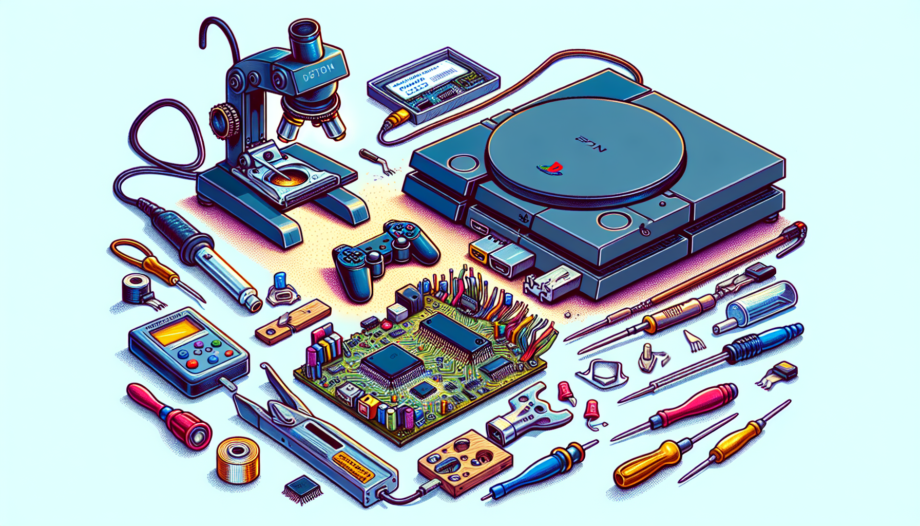
Identifying the Damage
The problem at hand involves a damaged HDMI port on a PlayStation, as stated in the ticket. The customer’s brother attempted to remove the old port by unwelding it, resulting in the damage. However, the author of this blog assures the customer, Laura, that they will fix the issue without any problems.
Upon assessment, the damage does not seem severe. There are no ripped or damaged heads. The presence of flux indicates that the previous soldering job might not have been successful. Nevertheless, the situation is manageable.
The old port has been successfully removed, making way for the new port. Under a microscope, all the pins of the new port appear to be in great condition. However, the author has some concerns about the legs of the customer-supplied port. They do not appear as puddly as desired, which may affect the quality of the connection. Despite this, the author decides to proceed with the repair.
Before proceeding, the author tests the motherboard without fully connecting it to ensure everything is functioning correctly. The tester indicates that the power is okay, but there is no display on the screen. Therefore, the author moves on to evaluate the main chip and other components on the motherboard.
The shield and the chip are removed, and a donor chip from another board is used for the swap. After cleaning and attaching the new chip, the motherboard is tested again. The tester indicates that the power is okay, and the PlayStation logo appears, confirming that the repair is successful.
With the repair completed, the author puts everything back together, ensuring that all the components are properly reconnected. The final test confirms that the repaired PlayStation is fully functional.
Replacing the HDMI Port
When it comes to fixing a damaged HDMI port on a PlayStation, there are a few steps involved. Firstly, the old port needs to be removed. This can be done by carefully desoldering the connections and gently lifting the old port off the motherboard. It’s important to take your time and be gentle to avoid causing further damage.
Once the old port is removed, it’s time to introduce the new port. The new port should be aligned with the solder pads on the motherboard and soldered into place. It’s crucial to ensure that all the pins are properly aligned and making contact with their respective solder pads.
Before fully attaching the new port, it’s a good idea to do a microscopic examination of the pins. This involves using a microscope to closely inspect each pin for any signs of damage or misalignment. This step is crucial to ensure that the new port is in good condition and will provide a reliable connection.
During the examination, the author noticed that the legs of the customer-supplied port were not as puddly as desired. This means that the solder joints may not be as strong as they should be, which could potentially affect the quality of the HDMI connection. Despite this concern, the author decides to proceed with using the new port, as it is still a viable option for repair.
After carefully attaching the new port, it’s time to make the final decision to proceed with the repair. This involves testing the motherboard without fully connecting it to ensure that everything is functioning correctly. If the power is okay and there is no display issue, it indicates that the repair has been successful so far.
In conclusion, replacing the HDMI port on a PlayStation involves a process of removing the old port, introducing the new port, examining the pins under a microscope, discussing the condition of the legs, and making a decision to proceed with the repair. By following these steps carefully and taking the necessary precautions, it is possible to fix a damaged HDMI port and restore the functionality of the PlayStation.
Troubleshooting and Repairing the Motherboard
When it comes to troubleshooting and repairing the motherboard of a PlayStation, there are several important steps to follow. By carefully inspecting and testing various components, you can identify and fix any issues that may be causing the damage.
Overview of Motherboard Inspection
Before diving into the troubleshooting process, it’s crucial to inspect the motherboard for any visible signs of damage. Look for ripped or damaged heads, as well as the presence of flux, which may indicate previous soldering attempts. Assessing the condition of the motherboard will give you a better understanding of the extent of the damage.
Checking Diodes, Capacitors, and Filters
Next, focus on specific components like diodes, capacitors, and filters. These components play a vital role in the functionality of the motherboard. Inspect them closely for any signs of damage or malfunction. Replace any faulty components to ensure the proper functioning of the motherboard.
Examining the Main Power and Power Mosfets
The main power and power mosfets are critical for providing power to the motherboard. Check them carefully to ensure they are in good working condition. If you notice any issues or damage, consider replacing them to prevent further damage to the motherboard.
Identifying Signaling Items
Signaling items, such as chips and connectors, are responsible for transmitting signals between different components of the motherboard. Examine these items to ensure they are properly connected and functioning correctly. If any signaling items are damaged or not working, replacement may be necessary.
Focus on the Main Chip
The main chip is the heart of the motherboard and controls its overall functionality. Pay close attention to this chip and inspect it for any signs of damage or malfunction. If the main chip is faulty, it may need to be replaced to restore the full functionality of the motherboard.
Removal of the Shield and Chip
In some cases, it may be necessary to remove the shield and chip from the motherboard for closer inspection or replacement. Take caution when removing these components to avoid causing further damage to the motherboard.
Introduction of the Donor Chip
If the main chip is found to be faulty, a donor chip from another board can be used as a replacement. Ensure that the donor chip is compatible with the motherboard and carefully install it, following proper soldering techniques.
Installation and Testing of the New Chip
Once the new chip is installed, it’s time to test the motherboard to ensure everything is functioning correctly. Power on the motherboard and use a tester to check for any errors or issues. If the test indicates that the power is okay and the PlayStation logo appears, it confirms that the repair was successful.
Successful Repair and Conclusion
After successfully replacing the damaged HDMI port on the PlayStation, it is time to test the motherboard and ensure that the repair was successful. By following the necessary steps, the author can confirm that the problem has been resolved.
Testing the Repaired Motherboard
Before fully reassembling the PlayStation, the author tests the motherboard without fully connecting it. This allows them to check if everything is functioning correctly. The tester indicates that the power is okay, but there is no display on the screen. This indicates that further evaluation is needed.
Confirmation of Successful Repair
To address the display issue, the author proceeds to evaluate the main chip and other components on the motherboard. The shield and chip are carefully removed, and a donor chip from another board is used for the swap. After cleaning and attaching the new chip, the motherboard is tested again.
The tester confirms that the power is okay, and the PlayStation logo appears on the screen. This is a clear indication that the repair has been successful. The damaged HDMI port has been replaced, and the functionality of the PlayStation has been restored.
Reassembling the PlayStation
Now that the repair is confirmed, the author proceeds to reassemble the PlayStation. They ensure that all the components are properly reconnected, taking care to follow the necessary precautions. This step is crucial to ensure that the repaired PlayStation functions properly and is safe for use.
Final Validation with the Tester
Once the reassembly is complete, the author performs a final validation with the tester. This involves powering on the PlayStation and using the tester to check for any errors or issues. If the test indicates that the power is okay and the PlayStation logo appears, it provides further assurance that the repair was successful.
Assurance that the Problem is Resolved
With the successful repair and validation, the author can confidently assure the customer, Laura, that the problem with the damaged HDMI port has been resolved. The PlayStation is now fully functional and ready to be enjoyed without any display issues.
Video Link
Watch this YouTube video to see a demonstration of the repair process: